Friday, April 30, 2010

Family Activity - Indoor Hide and Seek!

Family Hide and Seek!

Who would have thought that such an old game
could still be so much FUN?!?
It's hard to believe that in a world so focused
on extreme entertainment, that a game so simple as
"Hide and Seek"
could actually keep us entertained.
It's especially fun in my house, because none of us
can stay quiet for more that 1 minute.
Most of the time I just sit in the corner and giggle until
my cheek muscles start to seize up!
Sooo FUN!
I have a feeling your kids will have a great time, no matter
how old they are.
Families with older kids should try . . .
"Hide and Seek in the Dark"
is even better!
The only person with a flashlight is the one who is IT.
The rest of the family has to find their hiding places in the dark.
(Just make sure you secure any breakables.)
If you don't want to use a flashlight,
you can just flip the lights
on and everyone hiding has to stay where they are.
What you thought was a great hiding place in the dark,
might leave you hiding in plain sight once the lights are on.
Hope you have a Great Night with Your Family!
After all that running around, you won't
feel one bit of guilt as you whip up an
over-the-top
Rootbeer Float!
If you really want to go CrAzY . . .
You could use Cream Soda, Orange Soda or
Dr. Pepper!
Just get everyone their own can of pop in their favorite flavor,
and ENJOY!

Thursday, April 29, 2010

Preserve It . . . Canning Corner - Jar Cakes!

Jar Cakes are the Coolest Invention!
Who would have thought that you could bottle a
cake and it would last for 4-6 Months?!?
Cake Jars work best when made from scratch.
Heavy Cakes do the best!
Pictures are coming, my cakes are in the oven
as we speak!
You Will Need:
Clean Wide Mouth Pint Jars and Rings
New Lids
and Your Favorite Recipe!
(Avoid cakes with chunks like zuchinni or carrots.)
Use Crisco to grease the insides of the jars.
Use 1 cup of cake mix per jar.
Make sure jar rims and super clean so that the jars
will seal correctly.
Bake cakes in jars that have been placed
on a cookie sheet. (Bake WITHOUT Lids!)
Place lids on jars until immediately after baking.
Jars will be hot so make sure you use hot pads.
Lids should be placed in simmering water while cakes are
in the oven so they will be ready for the jars
when the cakes have finished baking.
Tighten lids with rings and listen for the ping.
A sealed jar lid will not move up and down after it has
been sealed correctly.  A sealed lid will be concave.
Let sit 12 to 24 hours and test the seal again.
Any unsealed jars should be put into the fridge,
and eaten within a few days.
(I'm sure it won't last longer than 1 hour!)
To eat cake . . . just use a knife to loosen the edges
and then the cake will slide right out.
Here are a couple of recipes for you to try:
Now you can have your cake and eat it too!

If you're looking for a Great Mother's Day Idea
this one would be MARVELOUS!
It's a . . .
A Jar Cake Swap
and
Mother's Day would be the perfect time
to give it a try! 
Each person will make a different cake jar recipe,
bring it baked and ready to Swap at a
Mother's Day Luncheon.
By the end of Lunch, you could have as many different
cakes as you have guests!
Sounds like a great idea to me, and I would love to have the
opportunity to try different recipes without having to
make them all myself first.
You could present each MOM with all of the
Jar Cake Recipes put together in a mini-photo album
that has been "Tricked-Out" with a little scrapbook paper
and ribbon!
(I'll see what I can do to help with that!)
I will the posting the second idea
I promised
yesterday . . . later today.
(Sorry, time just got away from me!)
Wednesday's Preparedness Project: 
A Portable Changing Pad!

Wednesday, April 28, 2010

A House of Order . . . and FUN: Time of Day Job Charts!

Time of Day Job Charts are Awesome!
The kids know exactly what jobs need to be done
and when they need to do them.
They have Morning Jobs or a Morning Routine:
They have Jobs they do After School or in the
Middle of the Day:
and
They have Evening Jobs or an Evening Routine:
Here's the PDF:
Job Chart Instructions:
Print the "Time of Day" PDF File.
Add Photos of kids doing each of their jobs
 to the white square,
or
Download this PDF and you can type your own
jobs in the white box and then print the file.
Here's that PDF:
Time of Day Small Chart PDF:
You will have two sizes to choose from.
I would use the larger size for photos for sure, but if
you are just going to type the jobs in the box the smaller
size is perfect for little hands.
Laminate Chore Tags.
Punch Hole in the Top of the Tag.
You can hang job charts on the fridge with the
magnetic hooks.
OR
You can use a Family Magnetic Board with the
same magnetic hooks.
You can get the hooks from Target, Walmart, or
Office Supply Stores.
You can also use a c-ring or ribbon to clip or tie 
all of their jobs tags together.
As they finish each job, just flip to the next tag.
Each Day Jobs are Done
your kids can put an "X" in one of the squares.
When the chart is filled up . . . They get a REWARD!
Here's the Chart and PDF:
I laminated my chart and I use a wet-erase marker
to mark the completed jobs.
At the end of the month, I just wipe it clean with
a wet wipe.
If you feel like you need to give weekly rewards,
Here's a Weekly Chart for You to Print:
Thank You
for all your technical support!
I was hanging on by my last fingernail by about 3:00 am
trying to figure this thing out!
Bless Your Hearts Forever!!!

Tuesday, April 27, 2010

I Can't Get My Photos To Upload For Some Reason!

I have been trying to get pictures uploaded from my
computer all afternoon.  Something is wrong with the blogspot
settings.  I'm calling for technical support in the morning.
(Do they have a technical support?)
I'm sorry I didn't get to post the
"A House of Order . . . And FUN" Idea
last night, but I'll post 2 tomorrow to make up for it!
Wish me LUCK!
Every time I try to upload a picture from my PC it
gives me three options that I've never seen before.
Pictures from Blog, From URL, or Picasa Web Albums.
I can't figure it out!
Has this happened to anyone before?
It's Fixed!
Thank You Sooo Much
For All Your Help!

Ark Prep 101 - Portable Showers!

I don't know about you . . . but in an emergency
I don't want to get caught with a case of the
RIPE-A-ROONIES!
I'm sure deoderant will work for a couple of days,
but after that . . . Good Night and Little Fishes, Get the Soap!
That's why the
Portable Shower
is the Topic for Today's Ark Prep 101!
As far as the Smith House is concerned,
I'm willing to do whatever it takes to avoid this stinky situation altogether!
I have 4 boys and I can only imagine what a few days without showers
would do for the senses.
Wowie . . . the thought of it makes my eyeballs water!
Now that you know my feelings on the matter,
Here's What You Will Need
to Keep Your Family Clean and Fresh:
Some kind of portable shelter. 
They range in price from around $60.00 on up.
This one costs $117.00 and has plenty of space for
a bench or a chair to assist small children or those with
special needs.
The shower enclosure below is from Cabela's.
It costs around $100.00.
You can also use a tarp and some rope
to make your own, which will save you quite a bit of money.
You just might want to work on your shelter building skills before you
try this one . . . just as a precaution to make sure that thing
doesn't fall down on you in the middle of your shower!
The next part of the shower is the Water System.
This is probably the most inexpensive one.
It's the Sun Shower.
It's basically warmed by the sun
and can hold 2 1/2 to 5 gallons of water, depending
on the size you buy.
  The cost is anywhere between $15.00-$30.00.
They have them at Target and Walmart as well as the
Sporting Goods Stores.
The shower below is the Zodi Hotman Extreme S/C Shower.
(Sounds like the Binford 2000!)
The cost is $170.00.
The water is heated with a 16 oz. propane bottle,
and can also be used as a cook stove.
The propane bottles are easy to store and inexpensive.
16 oz. Propane Bottles are a great preparedness item
to have on hand.
There are several different types of shelters and shower systems.
Watch for the sales so that you can get the best price.
IN THE MEANTIME
You may want to stock up on a
little extra deoderant . . . JUST IN CASE!
Check Back Later Tonight
I will be posting
"A House of Order . . . And FUN"
Idea

Monday, April 26, 2010

Family History Family Home Evening - It's Time to "PAWS" and "BEAR" Your Testimony!

It's a Family History Family Home Evening Tonight
and the topic is Testimony!
This is a great one to include Grandma and Grandpa in.
It doesn't matter if they live in another state or right next door,
they can be a part of this Family Home Evening.
Start with an Opening Prayer and Scripture.
"For thus shall my church be called in the last days,
even The Church of Jesus Christ of Latter-day Saints.
Verily I say unto you all:  Arise and shine forth, that thy light may
be a standard for the nations."
(Doctrine and Covenants 115:4-5)
Song:
"I Know That My Redeemer Lives"
Hymn #136
Lesson:
Dad and Mom can start by bearing their testimonies.
Explain what a testimony is and why it's important to share
our testimonies with others.
Explain that testimonies come a little at a time.
Line upon line, precept upon precept,
here a little, there a little . . .
Each time we bear our testimonies, we strengthen them.
We may have had an experience that came from an answer to prayer,
which strengthens our testimony as to the power of it.
We may have had experiences that came from paying tithing,
strenthening our testimonies as to why we pay it.
Testimonies are alot like Quilts.
They are added to piece by piece.
Line upon line, or stitch by stitch they become stronger.
Each piece adds beauty and warmth to the quilt,
just as a strong testimony adds warmth and beauty
to our spirits.
One of the greatest things we can share with another person is
our testimony of Jesus Christ.
Have each member of your family take a few minutes to
write their testimonies on the cards below.  These cards can be
added to your Family History Scrapbook.
 Don't Forget to add the testimonies of
Grandparents and Great Grandparents to
your family history book. 
Can you imagine what a TREASURE they will be
not only for your family, but for generations to come!
Here's the PDF for the Testimony Card and Page:
Testimony Card:
Testimony Page:
Bearing your testimony in front of other people
can be a little scary sometimes.
This game should help with that.
It's the . . .
Take the time to
"PAWS" and "BEAR"
your Testimony
Game.
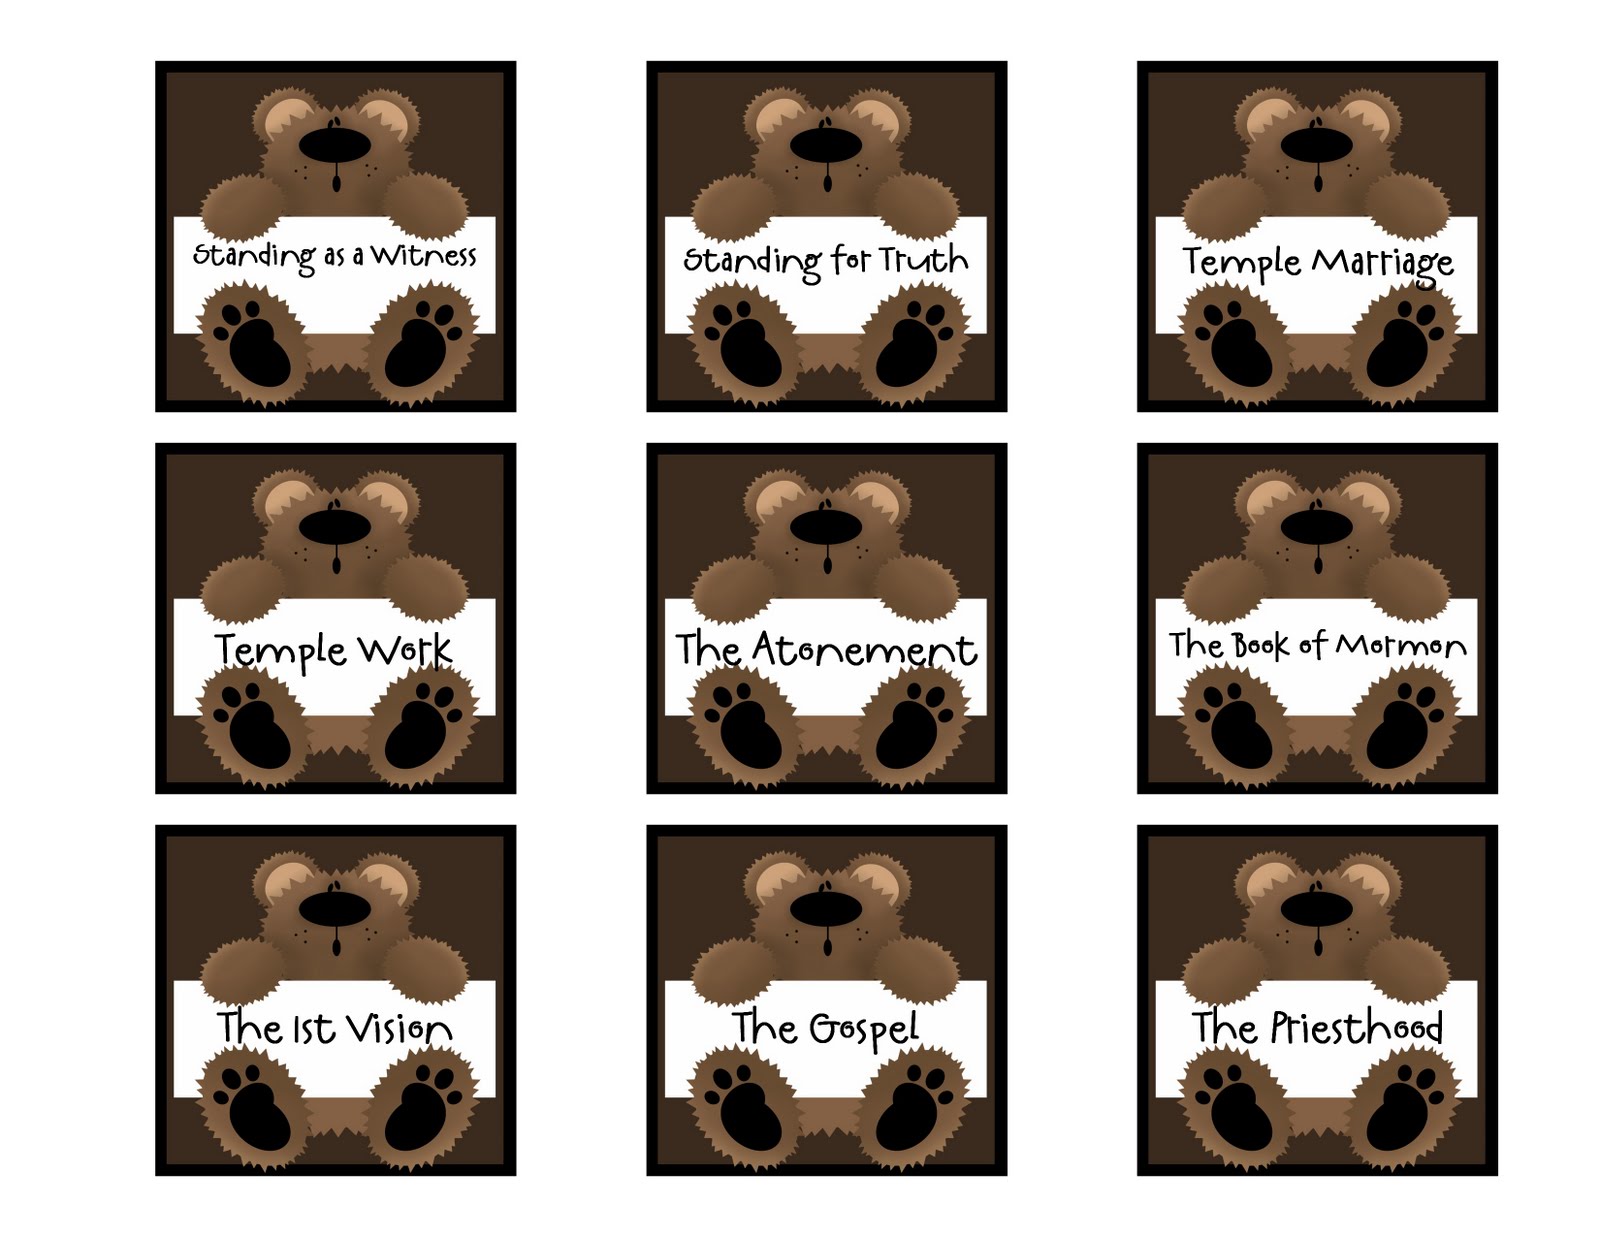
The Bear Side is above and
the Topic Side is below.
Here's the PDF:
Please make sure you use the game for YOUR Family
and not as a product you are selling or posting on your blog.
Bless YOUR Hearts for being so sweet and referring
them back to the Prepared Not Scared Blog.
The artwork is original and just for YOU!
To Make the Game You Will Need To:
Print the PDF on regular paper.
Purchase Black or Brown Cardstock
Cut cardstock into 3"x 3" Cards.
Cut out each Testimony Card.
(There is a front and a back side.)
Attach the Bear on one side,
and the Topic on the other side.
Laminate the cards.
Find a bag to keep them in.
(I found mine at Hobby Lobby for $1.00)
That's it . . .you're ready to play.
To Play the Game:
Each person will take turns drawing a topic
from the bag.
They get to stand in front of the family and
talk about their topic and what it means to them.
Take as many turns as you would like.
This game is a great way to practice standing
in front of people and speaking.
Maybe after a little practice it won't be so scary standing in front
of the congregation . . . ?!?
(I'm still a little bit up in the air on that one, but I'm hoping!)
NOW FOR THE TREAT . . .
Banana Bread!
Here's the Recipe PDF:
Ok . . . so I posted Milk Dud Cookies Twice.
It was really supposed to be Banana Bread!
What a Morning!

Sunday, April 25, 2010

Vital Records - Employment: Retirement, Pension & Social Security Information!

This is the last part of the Employment Section!
To complete this section you will need:
Retirement and Pension Information
Profit Sharing Plans
Wages Statement or a Copy of Your Most Recent
Paycheck Stub
and
Social Security Annual Statements
Here's the PDF:
Just collect each of the documents listed above and place them
in clear page protectors with the matching divider page.
Next Week we will be starting the
Estate Planning Section.
Money and Order Forms need to be turned in
to Alicia Smith.

Saturday, April 24, 2010

Food Storage Meals & Menu Planning - Dessert: Sugar Cookies!

Today's Dessert Menu:
Sugar Cookies!
Here's the Recipe PDF:
(Recipe includes Sugar Cookie Dough and Butter Cream Frosting)
Cooking with Food Storage doesn't mean
hours in the kitchen.
You can add MIXES to your storage shelves and not
feel one bit of guilt!  There I said it, I use mixes sometimes!
It's important to know how to make things from scratch,
but when you need things in a hurry . . . mixes are a
great alternative!
(They usually go on sale all the time too!)
Either way the results will be AMAZING!
This Jiffy Sugar Cookie Mix
is a great addition to your Food Storage Supply.
There are several types of cookie mixes. 
The cost is usually under $2.00
Powdered Eggs work very well with these mixes.
Seriously . . . You should try them!
In just a few minutes you can make:
Mini Fruit Pizza's
Topping is made with cream cheese and sweetened
with a little powdered sugar.
Mix and spread over cooled sugar cookie.
 Thumbprint Cookies
Use a flower cookies cutter to make these flower cookies.
The centers can be candied marichino cherries, a little jam,
or a piece of chocolate.
I like to add the candy melts, but I wait until the cookies have
cooled and I just attach them with a little dot of frosting.
You can make the colored daisies with white or yellow centers.
ANY color would be stinkin' cute.
 
 Sprinkle Cookies
Add large sugar sprinkles before baking.
Even though this seems like the easy way out,
avoiding hours of decorating . . .
I think sprinkle cookies are super cute.
 
 Colored Sugar Cookies
Just add food coloring to the sugar cookie dough.
Divide dough before adding the color if you would like
more than one color.
These cookies are made with a circle cookie cutter,
a stylus or toothpick to make the button holes,
and the inside ring on the button is just made with a smaller
circle cutter pressed about half-way through
the thickness of the cookie.
(These steps need to be done BEFORE baking.)
 
 and
Cinnamon Sugar Crispers
Roll sugar cookie dough balls into cinnamon sugar.
Flatten cookies before baking.
 
You can even make cookies on a stick!
Cookies on a stick can be any shape.
Just use your favorite cookie cutter.
Sticks need to be placed before baking.
You can use popsicle sticks or sucker sticks.
I usually make these cookies a little thicker so that they
are more sturdy on the stick.
I think these cookies would make the cutest Mother's Day Bouquet!
They could be set in a pot filled with beans, wrapped in cellophane
and tied with the napkin, or put into a small vase at each place setting.
You could also put a bunch of them into a larger pot
to use as a centerpiece!
(I'll take some pictures so you can see what I mean!)
Whether you make them from scratch or from
a mix . . . the possibilities are endless.

Friday, April 23, 2010

Preserve It . . . Canning Corner - Strawberry Vinaigrette Dressing Recipe!

I had on the calendar to make Hot Fudge Sauce today,
but Strawberries are such a great price right now I thought
you might like this recipe instead.
Bottled Strawberry Vinaigrette Dressing
Here's the Recipe PDF:
Can you imagine having this homemade dressing on hand?
The recipe PDF Includes:
 Two Dressing Recipes and a Salad Recipe
Soooo Good!

Thursday, April 22, 2010

Family Activity - Blanket Forts are the BEST!

When I think of some of my favorite adventures as a
little girl . . . BLANKET FORTS are in the Top 10!
My sisters and I made them under tables, over chairs,
and on the clothes line.  We could spend hours rearranging
every blanket and pillow we could find.  My brother's job was
to tear them down so we could start all over again,
bless his little heart!
My boys have carried on this great tradition and it's fun to see
their imaginations at work.
It may look like just a pile of blankets to us . . .
But to them . . .
It could be a giant castle!
I have two older boys and two younger boys. 
All of a sudden the older boys seem to think they have
advanced far beyond the fort making years,
but when the younger boys start building their blanket forts
it's only a matter of minutes before the older ones are joining in.
It's just to hard to resist a good Blanket Fort!
 Oh, to be back in the day when we saw everything as an
ADVENTURE
instead of just a pile of blankets that need to be folded.
Well, TONIGHT IS THE NIGHT! 
We can still do ADVENTURE . . . RIGHT?!?
(I know you can, and you have a few hours to
mentally prepare, just in case you're feeling a little rusty!)
Here are a few fort making tools
you may want to have on hand:
Blankets
Pillows
Clothes Pins
Story Books
A Card Table
and
Treats!
Parents Challenge:
Step back in time and remember what it was like to just
PLAY!
Get into the fort building adventure and have fun.
Crawl inside and read stories and play games with your kids.
Don't worry about the mess for just one minute.
You'll always have something that needs to be cleaned,
BUT . . .
Little ones don't stay little for very long,
so enjoy this time with them while you still have it!
Here's a Great Blanket Fort Treat Recipe:
The BEST Rice Krispy Squares 
You've Ever Had!
My mother-in-law made these and HOLY COW,
they were AMAZING!
Ingredients:
Cupcake Pebbles Cereal
(I know, I hadn't heard of them before either!)
Marshmallows
Butter, Divided
Powdered Sugar
Milk
Vanilla 
Follow the package directions to make your
Rice Krispy Squares
(I always add extra marshmallows . . . nothing is worse than
a dried up rice krispy square!)
Spray Muffin Tins with Cooking Spray and
press prepared rice krispy squares into each space
leaving a little bit of a round top - like a cupcake.
The next part is what puts them over the top.
You FROST them with . . . Butter Cream Frosting!
Here's the Recipe:
4 cups Powdered Sugar
1/2 cup Butter, Softened
6 Tbsp. Milk
1 tsp. Vanilla
(Add 1-2 more Tbsp. of Milk if it's too thick.)
Just frost the tops of the cooled rice krispy treats
to make them look like Cupcakes.
WaLah
You just made
the Best Rice Krispy Treats EVER!
Wouldn't these make the cutest Mother's Day Place Settings!
(I just turned a goblet upside down and tied a bow.)